
Wednesday, September 05, 2007
Friday, August 24, 2007
Friday, April 06, 2007
Friday, September 15, 2006


Tuesday, September 12, 2006
The Art of Making Comments
Yet if we are going to realise the full social and educative potential of the medium, blogging etiquette demands that from time to time we leave a comment. Blogging is meant to be an interactive experience and it can be disheartening for bloggers to put themselves out there, watch the sitemeter tick over and never hear boo from a soul. I, for one, have resolved to leave comments on other people's blogs more often. I will also endeavour to more faithfully adhere to the convention of responding to comments on the blog itself rather than sending individual e-mails. Hopefully these steps will help enrich the comments section and your reading pleasure.
Against this background, it is timely to highlight that many browsers allow you to insert html tags when you make comments. This can be very handy. For example, if you want to refer to another link, rather than typing the plain url, you could type the code:
< a href= " www.brendagaelsmith.com " > < b > my website < /b > < /a >
And, voila, the link my website is magically embedded in bold in your comment.
Monday, September 11, 2006

Friday, August 11, 2006
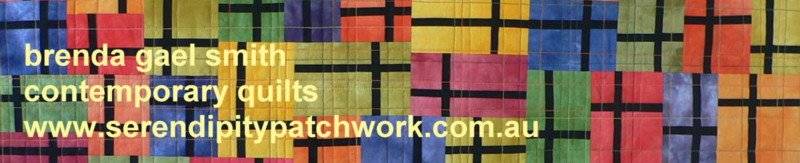
How to...create a personal blog banner
This post is prompted by Shelina’s post about the 10 top things she likes to see in blogs in which she declared:
“I too like personalized banners at the top of a blog. I also don't know how to create one, and am too lazy to figure out how on my own. Help would be appreciated.”
I experienced the same difficulty when I first set up my blog. I read up a little on html and after many, many frustrating hours (even with the assistance of a more html savvy friend) came up with a somewhat cumbersome solution – it worked but the code wasn’t very pretty. Since then I have found a more efficient way of inserting a customized header image on blogs. I do not purport to be an expert but I have helped others behind the scenes. There will be many other ways to achieve a similar result but here is one way you might like to try:
Image preparation:
- Find your favourite photo or photos.
- Using a photo manipulation program (eg Photoshop Elements), resize the photo(s) to approximately 600 - 800 x 100 - 200 pixels and add any text you desire such as the blog name and description.
- Save the new image in a memorable place on your hard drive;
- “Park “ the new image somewhere on the worldwide web – I hide mine in a back corner on my website but you can always post it somewhere on your blog;
- Right click on your parked image to find its url (look under “Properties”);
- Cut and paste the url details into a word document, notepad or similar where you will compose the code for your banner.
(If you don't have access to software for inserting text onto images, it is still possible to set up a personalised blog banner using your own image in combination with text from the blogger template. This process is beyond the scope of this post but if you look at the code for this blog by clicking "View:Page Source" on your browser (look especially at the code under "body" and "#header"), you may be able to work it out.)
Banner Code preparation:
Here is the magic code:
<a href="http://insert the url for your blog/"><img src="http://insert url of your banner image"
alt="insert blog title " /></a>
For example:
<a href="http://serendipitypatchwork.blogspot.com/"><img src="http://www.serendipitypatchwork.com.au/Blog/blogbutton.JPG" alt="Serendipity & the Art of the Quilt Blog" /></a>
This code does three things. It points to the beginning of your blog. It finds wherever you have parked your image. And it shows some text when you "hover" over the image (although this may not show up in some browers).
Template edits:
- Log into your account and click on “Change settings” on your dashboard.
- Click on Template and scroll down to the code for your template.
- Copy and paste all of the existing code for your template and save it in a safe place. This is your back up and means that you can revert to the status quo if all else fails.
- Scroll through your code to find something like this: <h1 id="blog-title">
<$BlogTitle$>:
</h1>
- Replace the tag <$BlogTitle$> with the code you prepared for your banner.
- Click on “Preview”.
- If everything looks OK, click on “Save Template Changes” and republish your blog
Troubleshooting:
If it doesn’t look right, it is probably because there remains some formatting code for your old look. It’s impossible for me to troubleshoot all the variables in this general guide but here are a couple of likely suspects:
1) If your blog description still shows up (and you don’t want it to). Find and delete this tag:
< p> id="description"> <$BlogDescription$> </p>
2) If there is a border showing up at the top of your blog (and you don’t want it). Find and delete the code relating to the borders. For example, in the “Minima” blogger template:
- From under the line “#header” delete: border:1px solid #ccc;
- From under the line “#blog-title”delete: border:1px solid #eee; border-width:1px 1px o;
- From under the line “#description”delete: border:1px solid #eee; border--width:o 1px 1px;
Of course, there are many other steps you can take to customise the colours and appearance of your blog. Don't be afraid to get down and dirty with the code!
Blog Button Code
<a href="http://serendipitypatchwork.blogspot.com/"><img src="http://www.serendipitypatchwork.com.au/Blog/blogbutton.JPG" alt="Serendipity & the Art of the Quilt Blog" /></a>
It should look like this:

Let me know if you have any difficulties and I'll try to help.